Introduction to Claude Code in Action
In my last blog, I shared my goal to get certified. I’ve started going through the course material from Anthropic. Instead of going in order, I jumped to “Claude Code in Action” and completed it. It took me just 4 hours, spread across 2 days to complete it. This blog focus on what I have learned. Basically “my revision notes”.
My AI stack, Kiro (at work), Claude & cursor, and GPT for general purpose task.
What is Claude code?
Claude Code is a coding agent from Anthropic. It is available as a CLI, an SDK, or as an IDE extension. Claude Code uses LLMs (Sonnet, Opus, Haiku) and tools to complete tasks.
How Does Claude Code Work?
- A language model on its own cannot interact with your codebase. For example, if you ask it to “read App.tsx,” it has no way to access the file. It needs tools.
- Claude Code solves this by pairing the LLM with built-in tools that handle common development tasks eg reading files, writing code, running terminal commands, and searching directories.
- Some of these tools include: Read, Edit, Write, Glob, Grep, Bash, TodoWrite, and Agent.
- Beyond built-in tools, Claude Code also supports external tools through MCP (Model Context Protocol) servers, such as GitHub, Playwright, and many more.
1. What is Context ?
Context management is crucial when working with AI coding tools. The clearer and more precise your prompt, the better the output. Always point Claude to the right and relevant files, you don’t want it wasting tokens searching through irrelevant content.
Claude Code provides several tools to keep context focused and productive. As well as , it provides commands for Managing Context in Claude Code:
- escape : cancel the current response
- escape + # : enter memory mode to save instructions for future conversations
- rewind conversations : step back to a previous point in the conversation
- /compact: compress the conversation to free up context window space
- /clear: reset the conversation entirely
a. /init : When you open a new project in Claude Code, run the /init command. It scans your entire project to understand the tech stack and architecture, generates a summary, and writes it to a CLAUDE.md file. This file is then included as context with every conversation.
b. claude.md: CLAUDE.md is an important file for your project. There are three types:
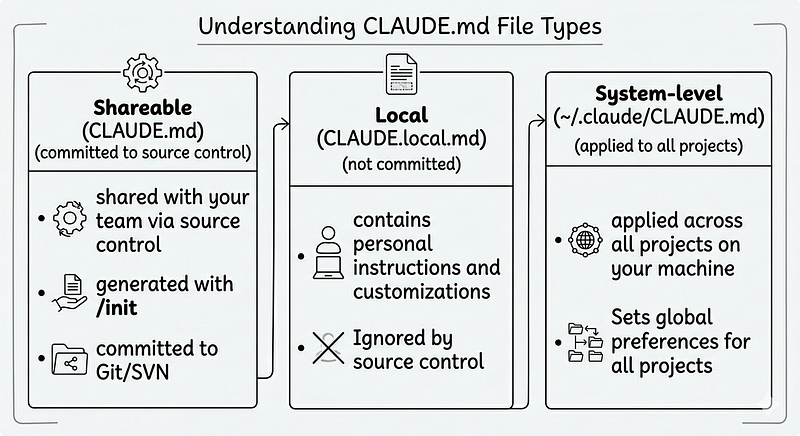
- Shareable (
CLAUDE.md), generated with/init, committed to source control, shared with your team - Local (
CLAUDE.local.md), not committed; contains personal instructions and customizations - System-level (
~/.claude/CLAUDE.md), applied to all projects on your machine
c. # (Memory Mode) : in the Claude Code CLI enters memory mode, which lets you save instructions that persist across conversations. These are stored in your CLAUDE.md files.
d. @ (File References): To keep context relevant, you can reference specific files in your prompts using @ followed by the file path. You can also use @ references inside CLAUDE.md to always include key files.
3. Modes in Claude
There are 2 modes in Claude, thinking and planning mode. Both modes are important while working with the Claude code.
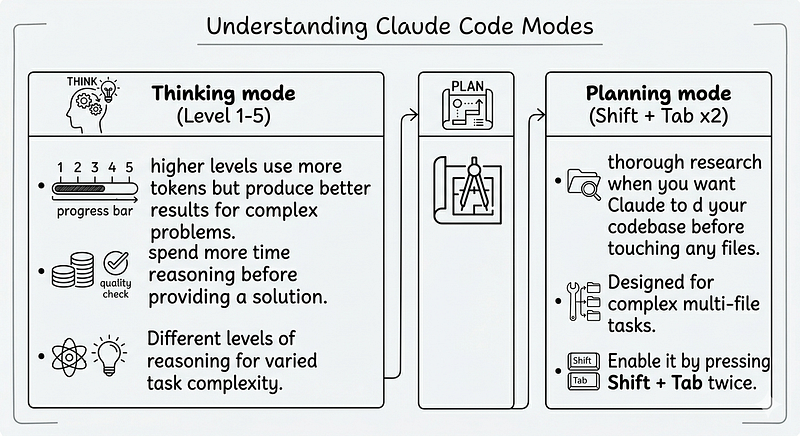
- Thinking mode: Claude Code offers different levels of reasoning through “thinking” modes. These allow Claude to spend more time reasoning before providing a solution. There are 5 levels: “Think”, Basic reasoning , “Think more”, Extended reasoning, “Think a lot”, Comprehensive reasoning, “Think longer”, Extended time reasoning “Ultrathink”, Maximum reasoning capability.
Higher levels use more tokens but produce better results for complex problems. - Planning mode: For complex tasks that require thorough research, Claude Code offers a planning mode. This is useful when you want Claude to understand your codebase before touching any files. Enable it by pressing Shift + Tab twice
In planning mode, Claude will:
- Read relevant files in your project
- Create a detailed implementation plan
- Show you exactly what it intends to do
- Wait for your approval before proceeding
When to Use Which?
- Thinking mode : when you need a better answer to a specific question or problem (reasoning depth)
2. Planning mode : when you have a large task spanning multiple files and want to review the approach before any changes are made (workflow control)
4. Hooks
Hooks let you run shell commands before or after Claude uses a tool. They are incredibly useful for automating workflows like formatting code, validating output, or blocking certain actions.
Claude Code’s normal flow is: receive prompt → choose a tool → execute tool → return output. Hooks insert themselves into this flow:
- PreToolUse : runs before Claude executes a tool (e.g., block writes to certain files, auto-format before saving)
- PostToolUse : runs after Claude executes a tool (e.g., run a linter after every file edit)
- Stop: runs when Claude finishes its response (e.g., auto-commit, send a notification)
How to Configure Hooks
Hooks are defined in your settings.json file. Like CLAUDE.md, there are three levels :
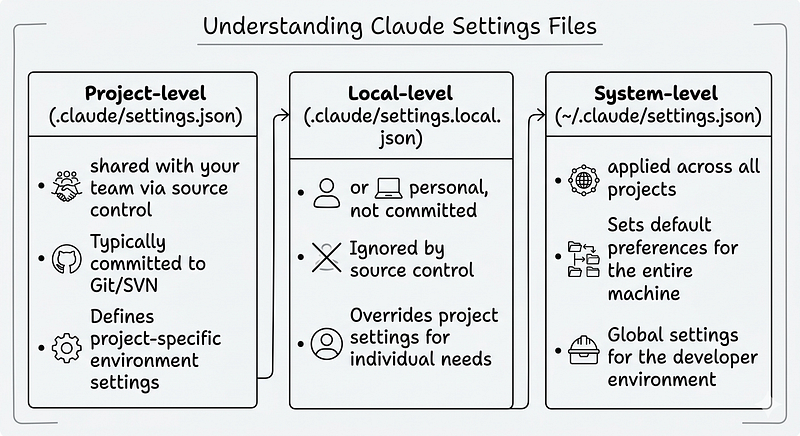
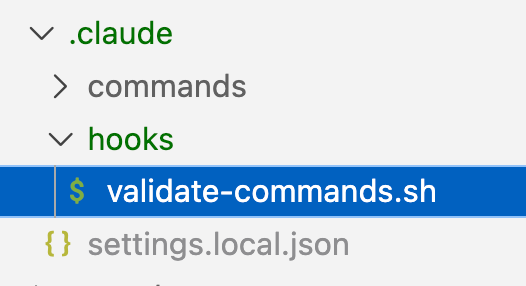
Hooks can be of 2 type. 1) Hook where only update configuration in settings.json eg: run TS check, run lint, etc. 2) Hook when you want to write some custom code eg: validating all the package.json commands are correct.
3. Custom (Slash) Commands
You can create custom commands in Claude Code that are triggered with a forward slash (/). These are useful for Automation, Consistency, Context, and Flexibility.
How to Create a Custom Command
- Go to the
.claude/directory in your project - Create a
commands/directory inside it - Create a markdown file, e.g.,
a11y.md - Write your instructions inside the file. Now typing
/a11yin Claude Code will execute the instructions from that file. - To have commands with arguments we can use $ARGUMENTS. Eg:
/a11y src/App.tsx
These are my custom commands for NextJS project.
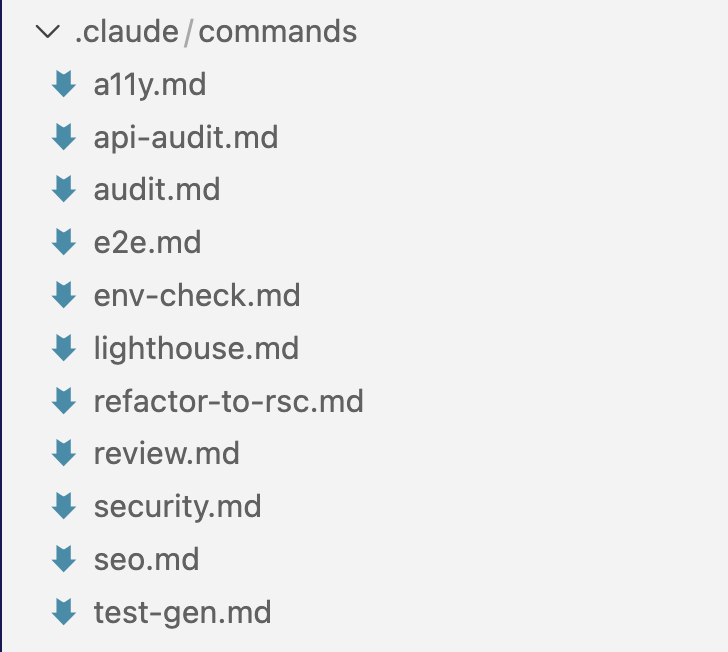
5. MCP
MCP is another way to extend Claude Code’s capabilities beyond its built-in tools. MCP servers act as plugins, they give Claude access to external services and tools. There are many MCP servers available, for example: Playwright, GitHub, Databases
You can find a full list of available MCP servers here.
Configuration
MCP servers are configured in .claude/settings.local.json (local, not shared) or .claude/settings.json (shared with your team). Claude will ask for your permission before using an MCP tool for the first time.
6. Best Security practices
Claude Code has a built-in permission system to keep you in control. A few things to keep in mind:
- Review before approving : Claude asks for permission before running commands, writing files, or using MCP tools. Read what it’s about to do before accepting.
- Use
.claude/settings.local.json: configure MCP servers and hooks locally so sensitive credentials are not committed to source control. - Don’t commit secrets : avoid adding
.env, API keys, or credentials to files that Claude might include in commits. - Use hooks for guardrails : set up
PreToolUsehooks to block writes to sensitive files or directories. - Scope permissions carefully : grant only the access Claude needs for the current task.
7. Claude folder
After setting up everything covered in this blog, here’s what your project structure looks like:
your-project/
├── .claude/
│ ├── commands/ # Custom slash commands
│ │ ├── audit.md
│ │ ├── review.md
│ │ └── …
│ ├── settings.json # Shared project settings (hooks, MCP)
│ ├── settings.local.json # Local settings (not committed)
│ └── hooks/ # Hook scripts
│ └── validate.sh
├── CLAUDE.md # Shared project instructions
├── CLAUDE.local.md # Personal instructions (not committed)
└── … (rest of your project)
What to commit: CLAUDE.md, .claude/commands/, .claude/settings.json
What to keep local (add to.gitignore): CLAUDE.local.md, .claude/settings.local.json
What’s next? I am doing Introduction to Claude Cowork
I have used AI for image creation , grammar check, and clarity of content.